These are the 10 early trinkets worth grabbing first in Mina the Hollower. They reduce death penalties, improve healing, smooth out movement hazards, and give you safety tools before the game starts asking for cleaner combat and platforming.
If you are looking for every trinket in the game, use the all trinkets database as the checklist. This guide is the practical early-game route: what to pick up around Ossex, what to buy from the trinket shop, and which hidden rewards are worth a detour before your first harder boss routes.
Quick answer: best early trinkets and locations
| Trinket | Where to get it | Why it matters early |
|---|---|---|
| Bell of Grace | Frayed side quest in Western Ossex / the Bowery | Can save half or all of your bones when you die |
| Valor Medallion | High Street flower side quest | Lets Mina heal while moving and retain plasma after being hit |
| Steady Soles | Hidden High Street rooftop chest | Normal movement on difficult terrain, better water control, and enemy knockback resistance |
| Plasma Funnel | Trinket Bazaar in Ossex | Drink healing vials twice as fast |
| Intravenous Vial | Trinket Bazaar in Ossex | Automatically heals when enough plasma is earned |
| Chain Capacitor | Chop Shop challenge east of Ossex | Builds a damage multiplier while you keep landing hits |
| Spike Spurs | Hidden room in Mourner's Mile | Reduces spike damage and prevents spike knockback |
| Proto Spark | Duke side quest in Queensberry Crypt | Revives Mina once, then recharges at a checkpoint |
| Primed Vial Pouch | Hidden basement south of Ossex | Adds two healing vials and makes empty-plasma heals still restore a little health |
| Flame Guard | Molten Foundry mini-dungeon | Blocks one fire or explosive hit, then recharges after a short delay |
Before you start: shops, kirs, and route order
You do not need every trinket before the first dungeon. If you want the cleanest start, follow the broader 8 things to do first route, then use this page to decide which trinket detours are worth your bones and kirs.
The early Trinket Bazaar is in Ossex, west of the central fountain. Its best first buy is usually Plasma Funnel, with Intravenous Vial becoming more attractive once you can afford another defensive slot. The hidden trinket shop basement people often search for is better thought of as two separate early rewards: the shop purchases in Ossex, and the Primed Vial Pouch hidden in a basement south of Ossex.
For general systems like Sparks, Bones, Underlabs, healing, and how trinket slots work, keep the beginner's guide nearby.
1. Bell of Grace
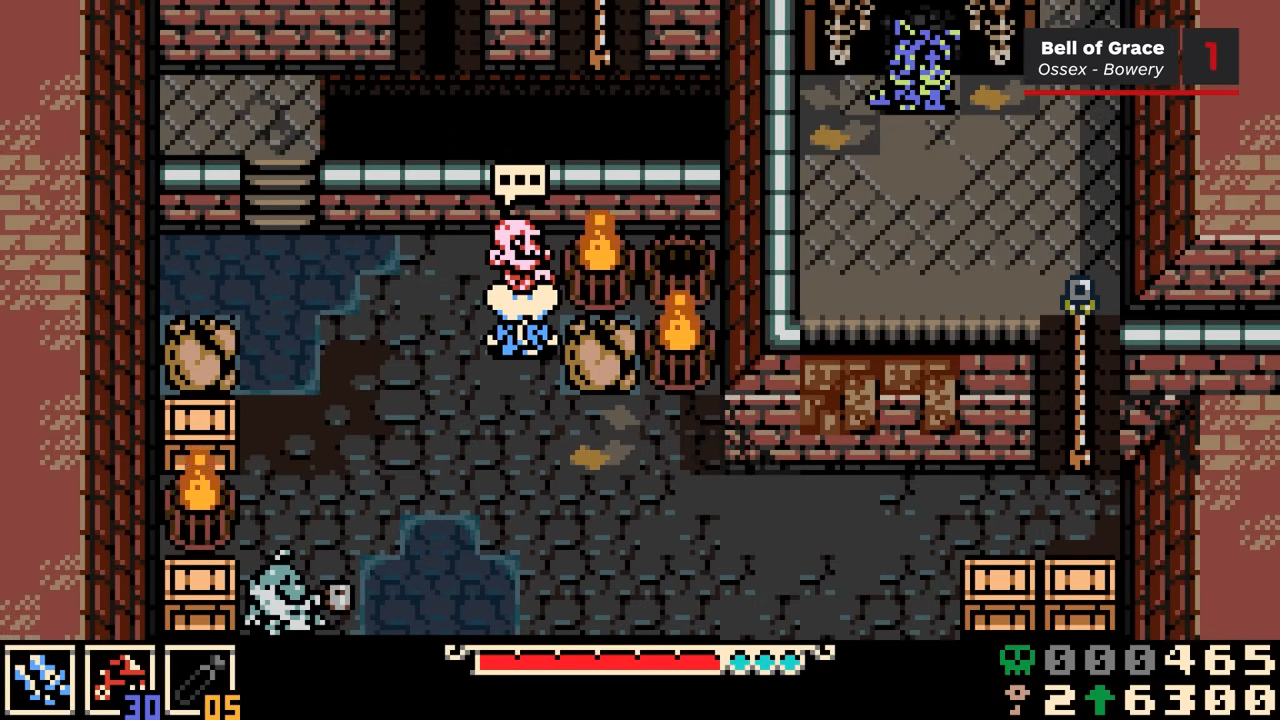
Where: Western Ossex, also called the Bowery, beneath the train station.
Cost: 1,000 bones after completing Frayed's side quest.
Database page: Bell of Grace
In the underside below the train station, talk to the red zombie named Frayed. Afterward, he begins appearing around Ossex and mugging Mina for a few bones at a time. Hit him as he runs away to recover some of what he steals.
After enough encounters, Frayed returns to the station underside in a defeated state. Give him 1,000 bones and he rewards you with the Bell of Grace.
Effect: The Bell of Grace gives you a chance to keep half or all of your bones when Mina dies.
Why you should get it early: Bones are scarce at the start, and losing them before you can recover your Spark can be painful. This trinket makes risky exploration much less punishing, especially if you are still learning how death and dropped Sparks work.
2. Valor Medallion
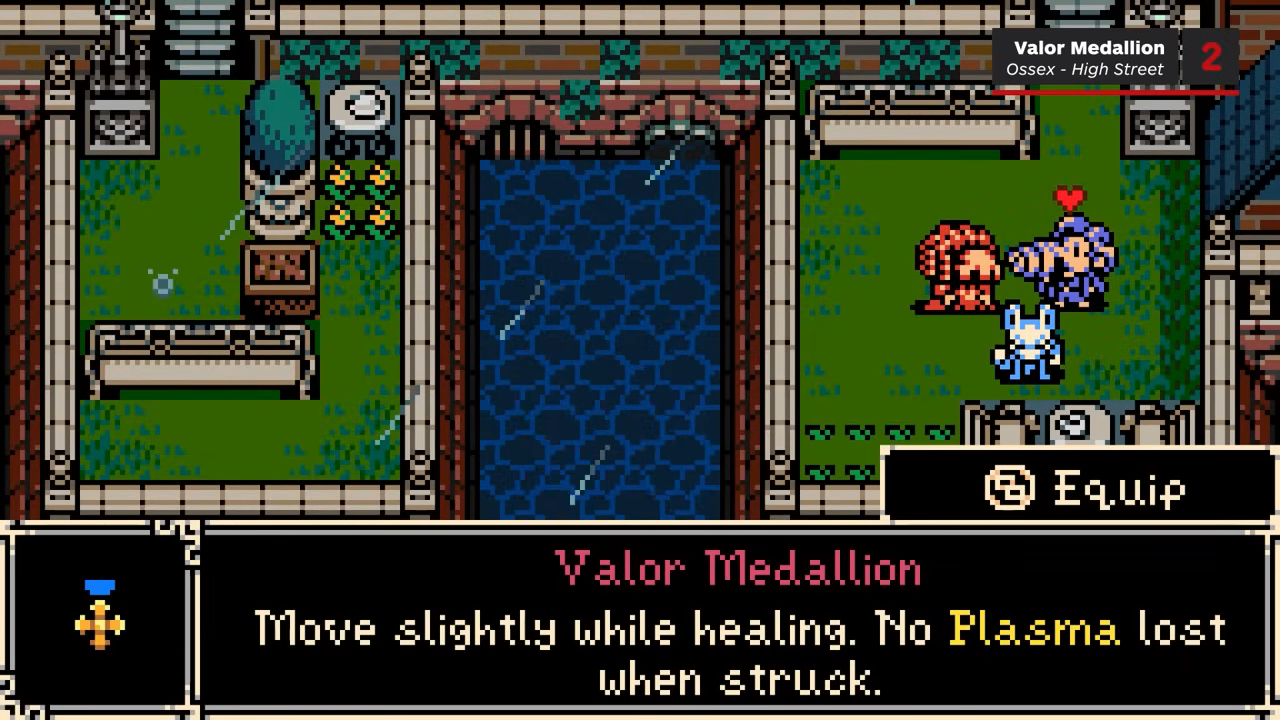
Where: High Street, Eastern Ossex.
Reward type: Side quest.
Database page: Valor Medallion
In southern High Street, a crying girl wants flowers. Across the channel, look for the purple man with a hidden long nose. Hit him when he lines up with the rooftop flowers, then cross his nose like a bridge.
Burrow under the flower pot to pick it up, bring it back, and throw it at the man so it breaks into a bouquet. Then use attacks and burrowing to nudge him south until he lines up across from the crying girl. Talk to him to complete the setup and receive the Valor Medallion.
Effect: Lets Mina heal while moving and keeps plasma from being lost when she gets hit.
Why you should get it early: Healing safely is one of the hardest parts of early combat. Being able to move during a heal makes boss fights and crowded rooms much more forgiving.
3. Steady Soles
Where: Hidden High Street rooftop route.
Reward type: Treasure chest.
Database page: Steady Soles
At the north end of High Street, return whenever you have a Cure Lock available. Unlocking the path opens access to a northern rooftop with a telescope. On the next screen, burrow through the small spaces beneath the railing, then drop through the first gap into an attic.
Inside, break the boxes, jump the barriers, and take the staircase in the upper-left corner. Outside, open the chest to get the Steady Soles.
Effect: Lets Mina move normally across several terrain types, improves water control, and removes knockback from enemy attacks.
Why you should get it early: Steady Soles is useful for the entire game. It makes traversal smoother, helps in wet or awkward terrain, and prevents enemies from knocking you into worse positions.
4. Plasma Funnel

Where: Trinket Bazaar, west of the central fountain in Ossex.
Cost: 700 bones.
Database page: Plasma Funnel
Find the purple building west of the central fountain. Clear the entrance by attacking the bright pile of wood near the debris, then enter the shop.
Buy the Plasma Funnel as one of your first shop trinkets.
Effect: Mina drinks healing vials twice as fast.
Why you should get it early: Faster healing means fewer interrupted heals. Once you can equip multiple trinkets, Plasma Funnel pairs especially well with the Valor Medallion for fast healing while moving.
5. Intravenous Vial
Where: Trinket Bazaar, west of the central fountain in Ossex.
Cost: 1,250 bones.
Database page: Intravenous Vial
The Intravenous Vial is another early Trinket Bazaar purchase. It is pricier than the Plasma Funnel, so consider buying it after you have a comfortable supply of bones.
Effect: Automatically uses a healing vial when Mina has earned enough plasma, skipping the drinking animation.
Why you should get it early: If you often forget to heal during combat, this trinket can save runs. The tradeoff is control: players who prefer careful resource management may want to stick with manual healing.
6. Chain Capacitor
Where: Chop Shop east of Ossex.
Cost: A kir to open the shack, then 50 bones per attempt.
Database page: Chain Capacitor
Leave Ossex through the eastern grassland. Directly north from the exit gate, look for overgrown grass and a locked shack. Spend a kir to enter the Chop Shop, then pay 50 bones to attempt the car-smashing challenge.
Destroy the car in 30 seconds or less to win the Chain Capacitor. If the challenge feels too hard immediately, come back after increasing Mina's attack power. The Iron Steed sidearm helps because crashing into the car can damage multiple parts at once.
Effect: Adds a damage multiplier that grows as you land attacks without missing or taking damage.
Why you should get it early: Chain Capacitor rewards clean play and is excellent for bosses once you learn their patterns.
7. Spike Spurs
Where: Mourner's Mile, northeast of the grasslands.
Reward type: Hidden trinket room.
Database page: Spike Spurs
From the first Mourner's Mile checkpoint, head east through the gate into the long room with moving platforms and pits. Exit north, fight past the knight, and continue north while bearing left.
When two enemies burst from crypts, look for a cracked tile on the wall between them. Break through it to reveal a hole Mina can burrow into. In the room below, navigate the spike traps and platforms to reach the Spike Spurs.
Effect: Reduces spike trap damage and prevents Mina from being knocked back by spikes.
Why you should get it early: Mourner's Mile and its nearby dungeon feature plenty of spikes. Equipping Spike Spurs turns several dangerous rooms into much safer routes.
8. Proto Spark
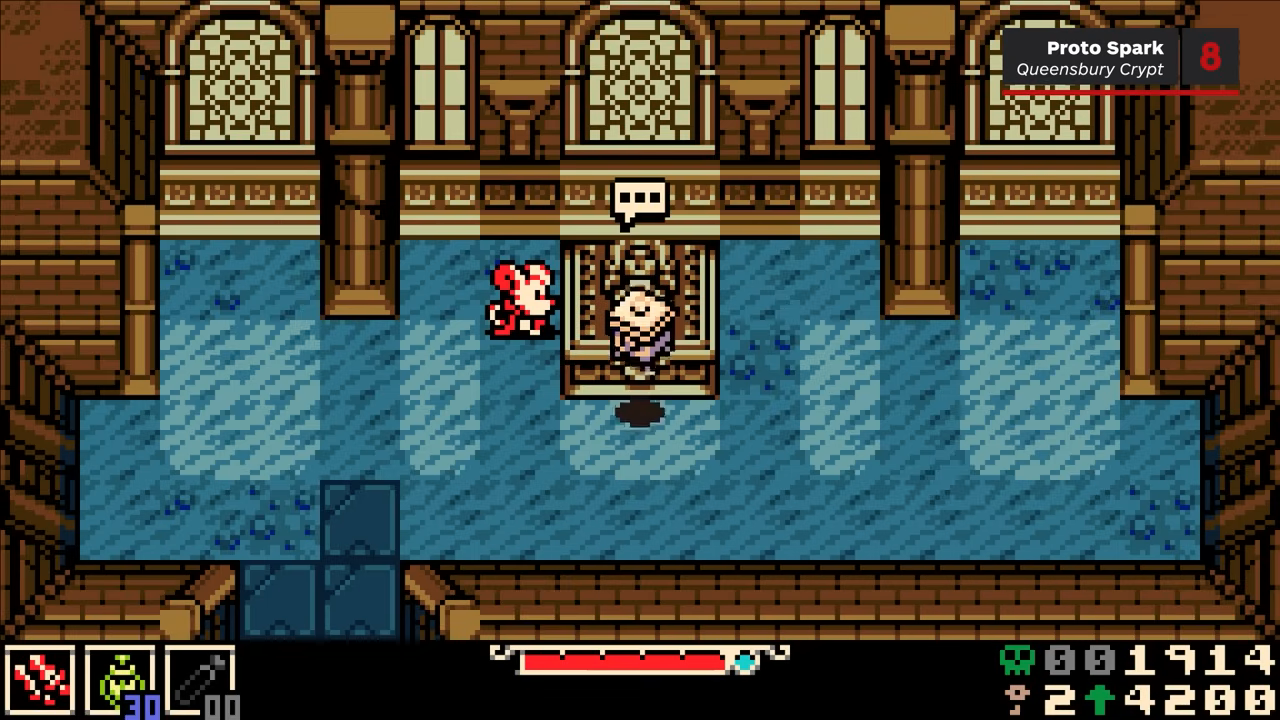
Where: Queensberry Crypt, northeast corner of Mourner's Mile.
Reward type: Dungeon side quest.
Database page: Proto Spark
Reach the lowest floor of Queensberry Crypt. Look for the long room with moving planks and many ropes to burrow under. In the room north of it, defeat the two zombie enemies and break the tombstone on the left to reach a hidden room with the Duke.
Speak to him and escort him across the floor. If he touches an enemy or obstacle, wait for him to stop panicking, then touch him again so he follows. Bring him to the boss chamber; you do not need to protect him during the fight.
After the Duchess of Queensbury fight, the Duke opens a secret door near the dungeon exit. Follow him through and complete his request to receive the Proto Spark.
Effect: Instantly revives Mina the first time she dies. After it triggers, it breaks until restored at a checkpoint.
Why you should get it early: An extra life is one of the strongest safety tools in Mina the Hollower. It does not refill your vials, but it restores most of Mina's health and can rescue difficult boss attempts.
9. Primed Vial Pouch
Where: Hidden basement south of Ossex.
Reward type: Hidden trinket.
Database page: Primed Vial Pouch
Exit Ossex to the south, then head west past the two soldiers and moving platforms. Take the next turn south onto a rooftop. Break the tree stump, move right to another rooftop, and burrow into the hole.
Break the box inside, take the stairs down, and collect the Primed Vial Pouch in the basement.
Effect: Adds two healing vials to Mina's total and makes vials restore at least a small amount of health even without earned plasma.
Why you should get it early: More vials mean more mistakes you can survive. The guaranteed minimum heal is also helpful when you need recovery before finding safe enemies to build plasma.
10. Flame Guard
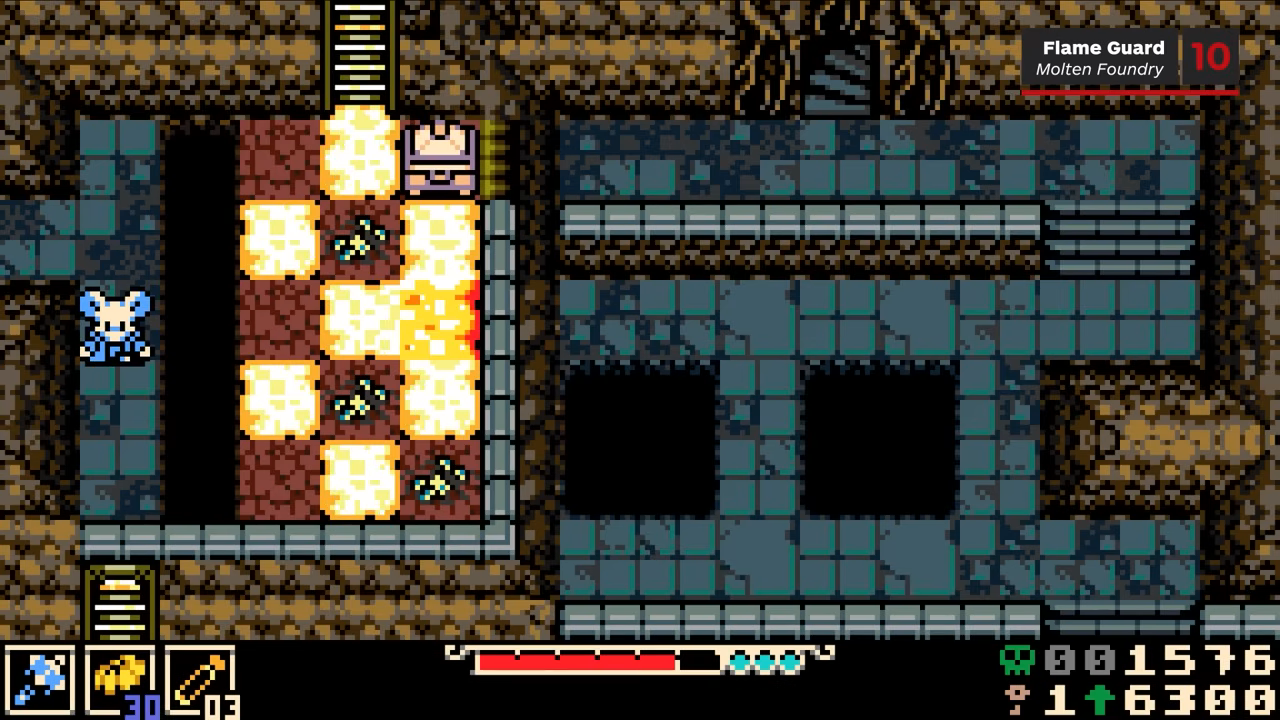
Where: Molten Foundry, north edge of the Occupied Bridge area.
Reward type: Mini-dungeon reward.
Database page: Flame Guard
From the Primed Vial Pouch route, continue north to the Occupied Bridge. On the northern edge, enter the Molten Foundry mini-dungeon. Drop through the broken walkway in the upper-right corner, then burrow left past the gate to reach a checkpoint.
Inside, redirect lava by digging through adjacent squares. The lava lights dark areas and destroys red crystals that normal attacks cannot break. Spend two healing vials and a cure to unlock the northeast blocks, then clear the lower gauntlet of lava routing, ropes, enemies, and moving platforms to reach the Flame Guard.
Effect: Blocks one hit from fire or explosive damage, then recharges after a few seconds.
Why you should get it early: Fire and explosive hazards show up often, and this trinket can prevent sudden deaths. It is especially useful for fire-heavy areas and tough fights against explosive or forge-themed enemies.
Best early trinket combinations
Once Mina can equip multiple trinkets, these pairings are especially useful:
- Valor Medallion + Plasma Funnel: Heal while moving and drink twice as fast.
- Proto Spark + Bell of Grace: Extra life plus better protection against bone loss.
- Spike Spurs + Steady Soles: Safer traversal through hazard-heavy areas.
- Chain Capacitor + Flame Guard: Stronger boss damage with protection against fire or explosive mistakes.
- Primed Vial Pouch + Intravenous Vial: More healing capacity with automatic emergency recovery.
For a wider loadout view across weapons, sidearms, and passive effects, compare these picks with the weapons, sidearms, and trinkets section of the beginner route.
Recommended pickup order
If you want the smoothest early route, prioritize them like this:
- Bell of Grace for death-risk protection.
- Valor Medallion for safer healing.
- Plasma Funnel once you can afford it.
- Steady Soles when you have a Cure Lock for the High Street route.
- Primed Vial Pouch for extra vials.
- Spike Spurs before pushing deep into Mourner's Mile.
- Proto Spark from Queensberry Crypt.
- Chain Capacitor when your attack power or sidearm setup makes the Chop Shop timer manageable.
- Intravenous Vial if you want automatic healing.
- Flame Guard before tackling more fire-heavy encounters.
These trinkets cover the main early pain points in Mina the Hollower: losing bones, finding safe heals, surviving hazards, and dealing enough damage during longer fights.
Early trinket FAQ
Where is the Mina the Hollower trinket shop?
The first important trinket shop is the Trinket Bazaar in Ossex, west of the central fountain. Start with Plasma Funnel if healing animations keep getting interrupted, then consider Intravenous Vial once you have enough bones and trinket slots.
Is there a trinket shop basement?
If you mean the hidden early basement reward, that is the Primed Vial Pouch south of Ossex, not a normal shop purchase. If you mean the shop itself, the Trinket Bazaar sells Plasma Funnel and later defensive options.
What is the best early trinket in Mina the Hollower?
For most players, Valor Medallion and Proto Spark are the strongest safety picks. Valor Medallion improves every heal, while Proto Spark gives you one death rescue after the Queensberry Crypt side quest.
Do I need these before Bone Beach?
No, but several stay useful long after Ossex. Bell of Grace, Steady Soles, Proto Spark, and Primed Vial Pouch are still good before later routes such as Bone Beach and its boss pages, including Major Miner and Mined Mind.
Where should I go next?
Use 11 tips you need to know for broader early-game decisions, or jump to the all trinkets database when you want to track every trinket beyond this starter route.
For later-game rankings and build comparisons, see the complete Mina the Hollower Trinkets tier list.