
Quick Answer
The best overall Trinkets in Mina the Hollower are the ones that solve common problems without needing a perfect setup: Uranium Bracelet for high-risk damage, Wallower's Gauntlets for route access, Plasma Funnel for safer healing, Joule Syringe for Sidearm sustain, Spring Heels for movement, and the simple stat boosters Twill Weave and Lace Glove.
For a first playthrough, start with safety and consistency before chasing risky damage. Bell of Grace, Steady Soles, Plasma Funnel, Primed Vial Pouch, Proto Spark, and Twill Weave make early deaths, hazards, and interrupted healing much easier to manage.
Best Trinkets at a Glance
| Need | Best Trinkets | Why they matter |
|---|---|---|
| Best overall defaults | Plasma Funnel, Twill Weave, Lace Glove, Spring Heels | They improve core combat, healing, or movement without asking for a special route. |
| Best boss damage | Uranium Bracelet, Lace Glove, Chain Capacitor, Shock Flint | They shorten fights when you can keep control of the encounter. |
| Best survival | Twill Weave, Plasma Funnel, Primed Vial Pouch, Proto Spark | They reduce damage, improve healing, or forgive a failed attempt. |
| Best exploration | Wallower's Gauntlets, Spring Heels, Keri the Wisp, Tunneling Codex | They open movement checks, secret routes, and cleanup paths. |
| Best farming and cleanup | Deboning Wand, Watchful Eye, Stolenoid, Glutton's Jug | They help Bones, pickups, and repeated enemy routes. |
| Best Sidearm sustain | Joule Syringe, Windfall Charm, Starving Beastium, Draining Beastium | They keep Sidearms active longer or push more value out of Joules. |
How We Ranked the Trinkets
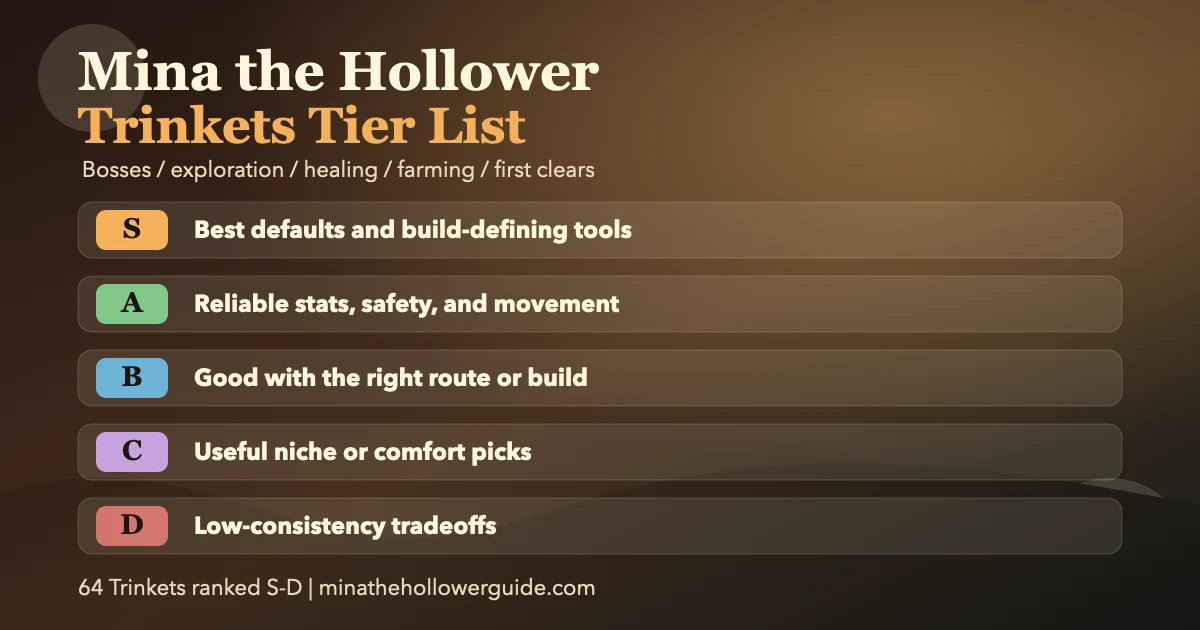
This is an independent editorial ranking, not an official Yacht Club Games tier list. The ranking was refreshed on June 16, 2026 using the site's current 64-entry Trinkets database, in-game reference notes, existing guide routes, and community-tested findings already captured in this project.
The list is written for a normal first playthrough first, then notes where New Game Plus, cleanup routing, farming, or challenge builds change the value. A Trinket can rank high overall because it helps many players often, or rank lower because it is powerful only when the exact room, boss, or build supports it.
Evaluation dimensions:
- Slot efficiency: whether the Trinket is worth the slot pressure compared with simpler damage, defense, healing, or movement options.
- Boss value: whether it helps in single-target fights where room-clearing effects often do nothing.
- Exploration value: whether it opens routes, secrets, terrain safety, or cleanup convenience.
- Survivability: whether it prevents deaths, improves healing windows, protects resources, or reduces punishment while learning.
- Availability: whether it matters early enough to shape a first route or arrives mostly as a specialist swap.
- Synergy: whether it becomes stronger with Sidearms, Vials, Sparks, low-health play, farming loops, or movement chains.
Complete Mina the Hollower Trinkets Tier List
Every documented Trinket is assigned to one tier below. D tier does not mean "never equip it"; it means the value is narrower, less reliable, or easier to replace than the Trinkets above it.
| Tier | Trinket | Effect summary | Best for | Why it ranks here | Details |
|---|---|---|---|---|---|
| S | Uranium Bracelet | Deal and receive significantly more damage. | Boss damage, confident melee play | The damage spike is build-defining when you know the fight. | Guide |
| S | Wallower's Gauntlets | Burrow into compatible walls. | Exploration, secrets, route cleanup | It changes what routes Mina can check, even though it is not a boss DPS tool. | Guide |
| S | Plasma Funnel | Drink Plasma Vials twice as fast and keep Vials when hit. | Healing safety, boss learning | Faster healing is valuable in almost every hard fight. | Guide |
| S | Joule Syringe | Gain Plasma from Sidearms; at 0 Joules, spend health for Sidearms. | Sidearm sustain, aggressive builds | It lets resource-heavy Sidearm routes keep functioning when Joules run low. | Guide |
| S | Spring Heels | Jump after landing for a longer, higher jump. | Mobility, platforming, cleanup | Simple movement reliability solves many rooms without special setup. | Guide |
| S | Twill Weave | Raises Defense level by one. | Survival, first clears | Boring in the best way: taking less damage is always useful. | Guide |
| S | Lace Glove | Raises Attack level by one. | Faster fights, clean melee | A direct damage increase without Uranium Bracelet's extra damage taken. | Guide |
| S | Proto Spark | Saves Mina from death once, then resets after dying. | Boss learning, safety | A one-time rescue is one of the clearest first-clear advantages. | Guide |
| S | Primed Vial Pouch | Carry 2 extra Plasma Vials; Vials always restore some health. | Healing consistency | More Vials and minimum healing smooth out long routes. | Guide |
| S | Steady Soles | Move normally on difficult terrain and resist knockback. | Terrain control, hazards | It turns awkward surfaces and knockback into manageable problems. | Guide |
| A | Bell of Grace | Chance to keep Spark on death and save Bones on sparkless demise. | Death-risk routes, early safety | It lowers the punishment for experimentation and rough learning runs. | Guide |
| A | Spark Catcher | Extra Spark Container; hit foes to recover lost Sparks. | Spark safety, recovery | It improves death recovery and keeps dropped Sparks from becoming a scramble. | Guide |
| A | Chain Capacitor | Consecutive hits boost damage; missing resets the combo. | Patterned bosses, clean play | Excellent when you can keep landing hits without breaking rhythm. | Guide |
| A | Keri the Wisp | Press Jump airborne to float and extend your fall. | Air control, platforming | It adds forgiving aerial control to rooms where one bad fall is costly. | Guide |
| A | Tunneling Codex | Hold Jump to burrow repeatedly without landing. | Hollowing routes, movement chains | Strong route tech for players who lean into burrow movement. | Guide |
| A | Pit Preserver | Bounce up from pits or water; pit damage reduced. | Pit-heavy rooms, water mistakes | It directly answers a common exploration death spiral. | Guide |
| A | Vascular Syrup | Health drains slowly after damage; cannot die until it runs out. | Survival, recovery windows | It gives you a chance to respond after a hit that would otherwise end the run. | Guide |
| A | Windfall Charm | Picking up Joules restores Plasma; Sidearm hits can drop Joules. | Sidearm economy, sustain | It links offense and recovery in a useful loop. | Guide |
| A | Evasion Powder | Longer invulnerability after damage and after exiting burrow. | Mistake recovery | Extended invulnerability helps prevent one hit from becoming three. | Guide |
| A | Dodging Pendulum | Press Jump right before damage to dodge and become invulnerable. | Skilled defense | Strong if your timing is good, but less automatic than passive defense. | Guide |
| A | Willow the Wisp | After damage, summon a wisp that boosts attack damage and speed. | Comeback pressure | It turns a mistake into a temporary offensive window. | Guide |
| A | Smelling Salts | Raises Sidearm level by one. | Sidearm builds | A simple stat bump for players already using Sidearms often. | Guide |
| A | Voltaic Guard | Blocks one lightning hit, breaks, then recharges. | Lightning-heavy routes | Excellent when lightning is the threat, replaceable elsewhere. | Guide |
| A | Flame Guard | Blocks one fire or explosion hit, breaks, then recharges. | Fire and explosion rooms | Great specialist protection in the right region or boss. | Guide |
| B | Glutton's Jug | Defeat 50 enemies while equipped to fill it. | Buffo quest, farming routes | Useful for quest progress and normal clears, less direct for bosses. | Guide |
| B | Seismic Belt | Press Attack while burrowing to emit a damaging pulse. | Burrow offense | Good if your route already uses hollowing as an attack pattern. | Guide |
| B | Shock Flint | Attack at full Plasma and health to fire a growing shock ball. | Clean starts, ranged pressure | Strong when conditions hold, weaker after you take damage. | Guide |
| B | Lightning Grip | After healing, call a damaging bolt and sometimes trigger on hit. | Heal-triggered offense | Good payoff if you heal often, but not always predictable. | Guide |
| B | Vial Salvo | Launch missiles when using a Vial; gain bonus Plasma if foes are hit. | Healing offense | Turns healing into pressure, especially in enemy-heavy fights. | Guide |
| B | Bellows Bustle | Press Jump while airborne to air dash. | Movement extension | Useful mobility, but overlaps with other movement tools. | Guide |
| B | Iron Lung | Increases maximum burrow time, even underwater. | Underwater and long burrows | Valuable where breath or burrow duration is the blocker. | Guide |
| B | Bridge Weaver | Step off a ledge to summon a web-weaving spider and cross gaps. | Gap crossing | Clever route utility, but not a universal movement upgrade. | Guide |
| B | Spike Spurs | Take less spike damage and walk on spikes without knockback. | Spike-heavy rooms | Excellent specialist protection in spike routes. | Guide |
| B | Valor Medallion | Move slightly while healing and do not lose Plasma when struck. | Safer healing | Very comfortable, though Plasma Funnel usually has broader value. | Guide |
| B | Helio the Wisp | After damage, summon a friendly wisp that restores health. | Hit recovery | Useful sustain after mistakes, but trigger-dependent. | Guide |
| B | Stolenoid | Pull nearby pickups toward Mina. | Cleanup, farming, comfort | Great convenience when collecting drops, not a combat answer. | Guide |
| B | Deboning Wand | Enemies reward more Bones, but Bones bounce around. | Bone farming | Strong economy value when you are intentionally farming. | Guide |
| B | Watchful Eye | Extra Bones for defeating a foe unharmed. | Clean farming | Rewards careful play and safe routes. | Guide |
| B | Pneumatic Armlet | Supercharge throws for faster, farther, higher-damage objects. | Throw setups | Good when throwable objects matter, quiet elsewhere. | Guide |
| B | Reckless Beastium | After healing, the next few hits are stronger, but Mina is more vulnerable. | Risky burst windows | Strong if timed well, dangerous while learning. | Guide |
| B | Draining Beastium | Sidearms deal more damage but consume more Joules. | Burst Sidearm damage | Higher output at the cost of tighter resource management. | Guide |
| B | Starving Beastium | Vials refill Joules on use but restore less health. | Joule recovery | Useful for Sidearm-heavy play, but the healing penalty is real. | Guide |
| C | Bubble Ring | Rapid hits form a shield that absorbs one hit. | Multi-hit safety | Helpful when you can build the shield before danger arrives. | Guide |
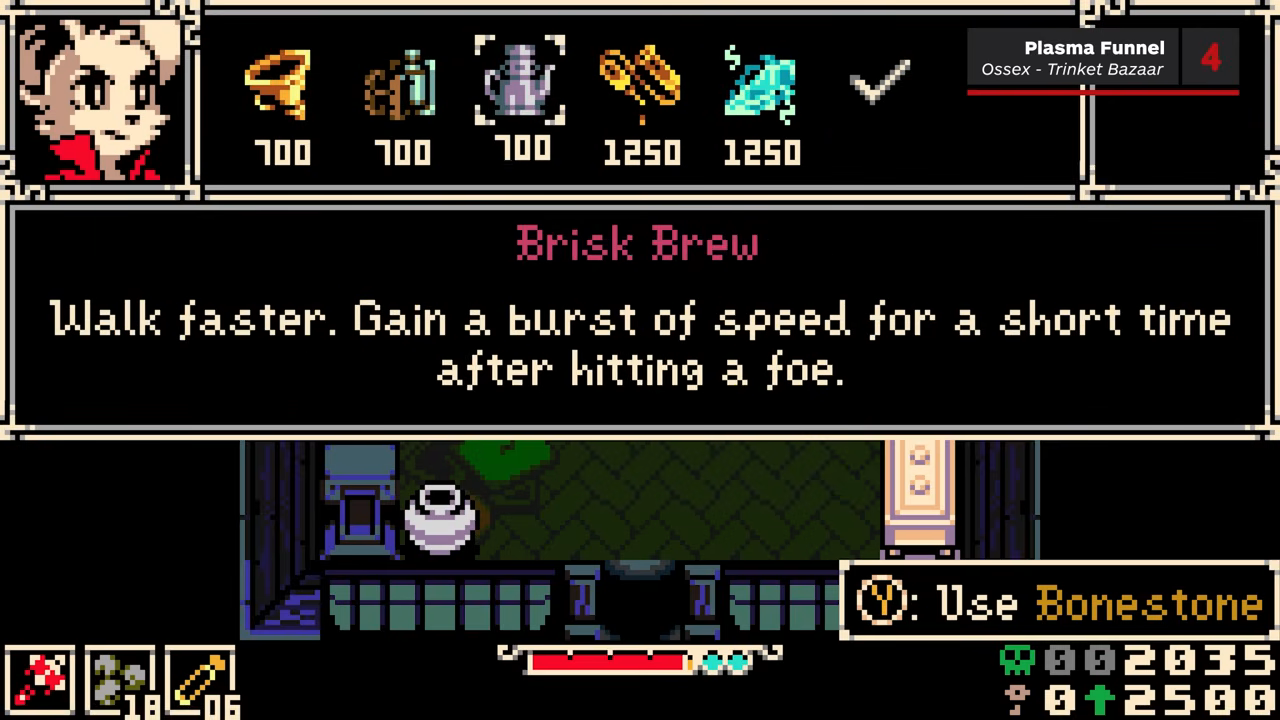
| C | Brisk Brew | Walk faster; gain a burst of speed after hitting a foe. | Speed comfort | Fun and useful, but not as essential as movement unlocks. | Guide |
| C | Counter Vial | Dodge and launch a burst if struck while readying a Vial. | Healing defense | Nice save during healing, but relies on being hit at the right time. | Guide |
| C | Desperation Bonnet | Deal more damage and spend less on Sidearms at low health. | Low-health builds | Powerful only if you are comfortable living near failure. | Guide |
| C | Thermal Pack | Boosts damage after death or exiting Underlab; fades then returns stronger. | Recovery routing | Interesting comeback value, but not a clean default. | Guide |
| C | Tumbling Tutu | Press Jump airborne for a spin attack and enemy bounce. | Movement offense | Stylish and useful in specific rooms, but less consistent than Spring Heels. | Guide |
| C | Niter Belt | Creates a radial explosion when emerging from burrow. | Burrow burst | Good room damage if you are already surfacing near enemies. | Guide |
| C | Oozing Organ | Leave a damaging ooze trail while burrowing. | Area denial | Works when enemies follow your path, weaker against mobile targets. | Guide |
| C | Repulsing Root | When hit, drop a Mourndrake that pushes and damages foes. | Emergency spacing | Can save space after damage, but you do not control the trigger. | Guide |
| C | Blinking Glass | Sometimes avoid damage and become briefly invulnerable. | Random defense | Avoiding damage is good, but chance-based protection is hard to plan around. | Guide |
| C | Polyp Lamp | Glows faintly and reduces damage in dark places. | Dark routes | Useful in dark areas, low impact elsewhere. | Guide |
| C | Bone Charm | Survival-first comfort with early-game drawbacks. | Learning routes | Helpful for cautious players, but outclassed by stronger safety tools. | Guide |
| C | Spark Pin | Helps resource economy and Sidearm uptime. | Sidearm support | Useful economy support, but not a primary build engine by itself. | Guide |
| C | Warding Beastium | Take less damage, but healing is much less effective. | No-heal or defense tests | The mitigation is appealing, but the healing penalty is steep. | Guide |
| C | Dead Leaf | Stand still to become a silent statue until you move. | Stealth, summon setups | Strong in tested stationary/summon plans, awkward in normal movement fights. | Guide |
| D | Fly Bait | Defeating enemies attracts friendly flies that attack foes. | Enemy-heavy rooms | It needs enemy defeats before it starts helping. | Guide |
| D | Dummy Cache | Press Heal to place a Joule-filled decoy that distracts enemies. | Decoy setups | Interesting control, but it competes with simpler survival picks. | Guide |
| D | Moon Ring | Exploration comfort and trap forgiveness. | Cleanup comfort | Nice when it solves a specific hazard, but rarely a priority slot. | Guide |
| D | Grave Token | Low-health risk-reward damage and defense tradeoff. | Challenge damage | The upside is narrow and the downside punishes mistakes. | Guide |
| D | Volatile Beastium | Foes sometimes drop a bomb on death. | Room-clearing experiments | The effect depends on enemy deaths and is unreliable for bosses. | Guide |
| D | Burning Beastium | Create damaging fireballs when hit; jump or burrow to avoid them. | Risky crowd control | It triggers after damage and can complicate positioning. | Guide |
| D | Intravenous Vial | Automatically use a Vial when enough Plasma is available. | Automatic healing | It can save distracted players, but removes timing control. | Guide |
S Tier Trinkets
Uranium Bracelet
- Effect: Uranium Bracelet makes Mina deal significantly more damage while also receiving significantly more damage.
- Best use: Bosses and elite enemies whose patterns you already know.
- Why it belongs in S tier: Few Trinkets change time-to-kill as dramatically, so confident players can end dangerous fights before attrition matters.
- Main limitation: It is punishing during blind attempts because every mistake hurts more.
- Related guide: Uranium Bracelet
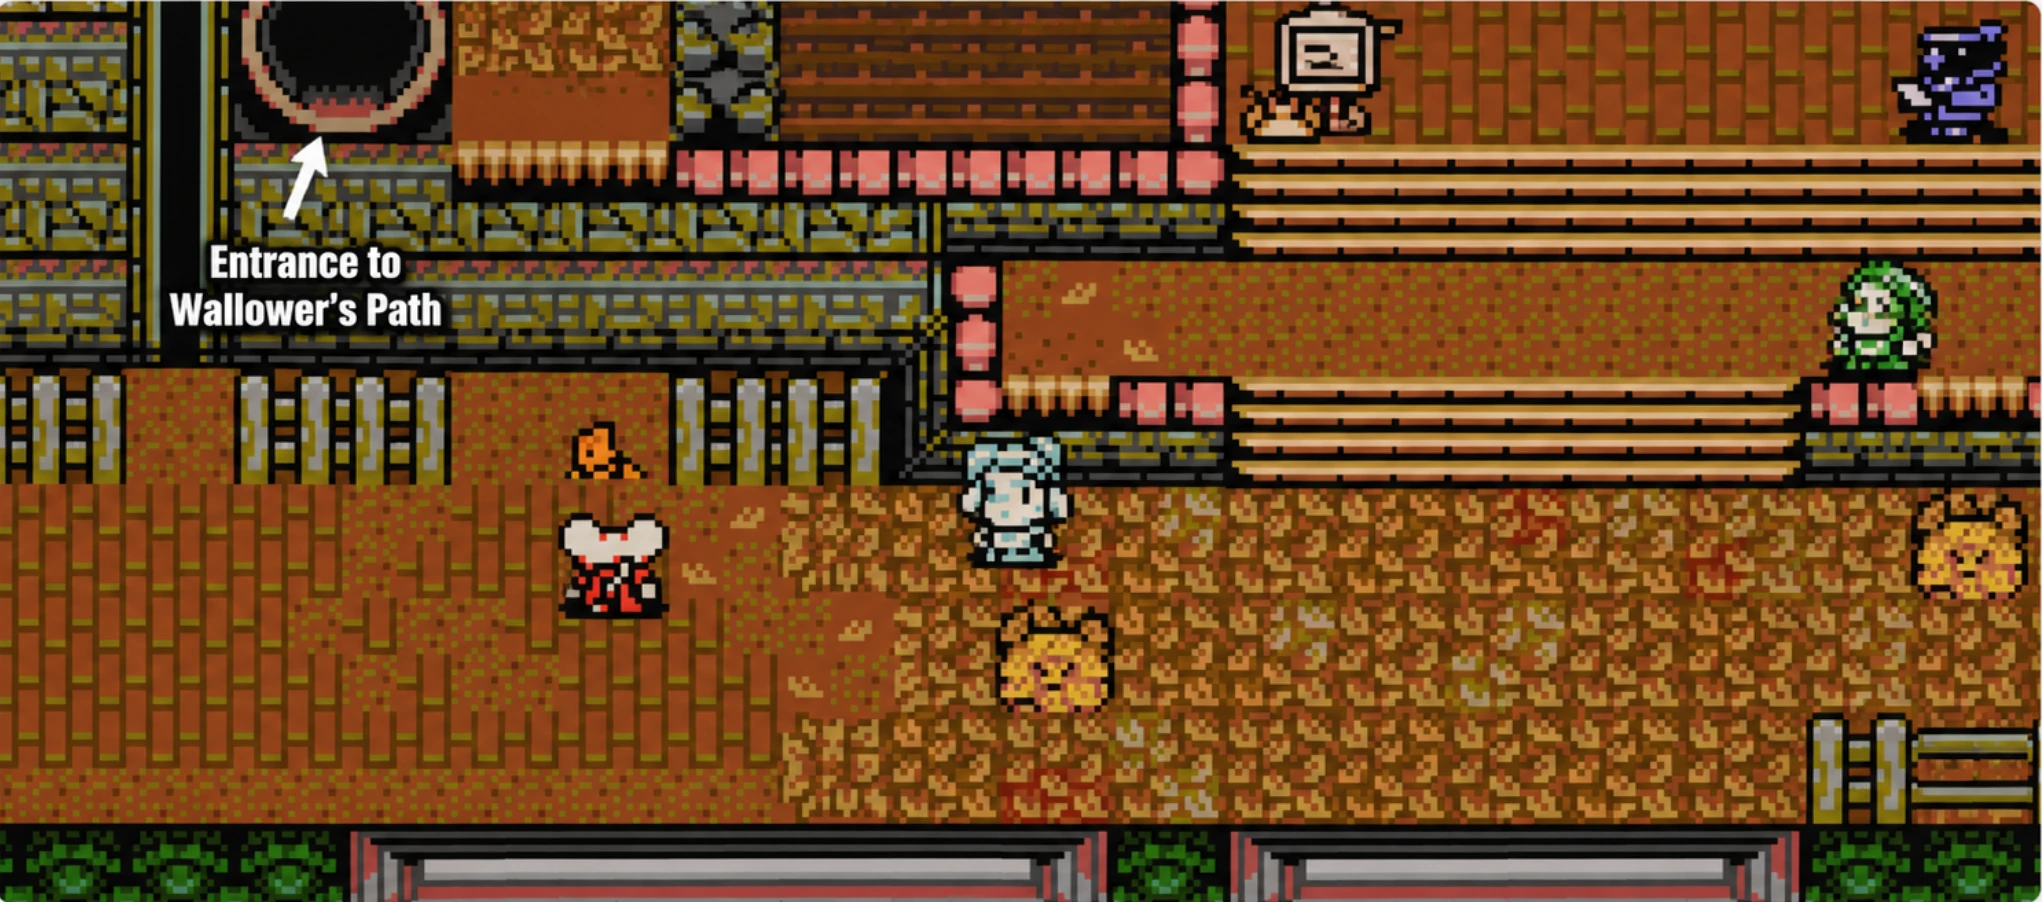
Wallower's Gauntlets
- Effect: Wallower's Gauntlets let Mina burrow into compatible walls.
- Best use: Secret hunting, route cleanup, and exploration sessions after you unlock the relevant area.
- Why it belongs in S tier: It changes what parts of the map Mina can interact with, making it more like a route key than a normal comfort item.
- Main limitation: It does not directly improve boss damage, so swap it out for strict fights.
- Related guide: Wallower's Gauntlets
Plasma Funnel
- Effect: Plasma Funnel makes Mina drink Plasma Vials twice as fast and prevents Vial loss when hit.
- Best use: Boss learning, late-route healing, and any fight where drinking safely is the hard part.
- Why it belongs in S tier: Faster healing is useful in almost every difficult route and pairs well with defensive builds.
- Main limitation: It does not increase raw damage.
- Related guide: Plasma Funnel
Joule Syringe
- Effect: Joule Syringe gives Plasma from Sidearms unless Mina is at 1 HP; at 0 Joules, Sidearms can spend health.
- Best use: Sidearm-heavy builds that want sustain and resource conversion.
- Why it belongs in S tier: It turns Sidearm pressure into recovery value and keeps resource loops alive.
- Main limitation: The health-spending condition can become dangerous if you are already low.
- Related guide: Joule Syringe
Spring Heels
- Effect: Spring Heels let Mina jump after landing for a longer and higher jump.
- Best use: Platforming, exploration, and hazard rooms where jump height matters.
- Why it belongs in S tier: It is simple, always understandable, and useful long after you first equip it.
- Main limitation: It is a movement answer, not a boss damage answer.
- Related guide: Spring Heels
Twill Weave
- Effect: Twill Weave raises Mina's Defense level by one.
- Best use: First clears, boss learning, and routes where you are taking chip damage.
- Why it belongs in S tier: Direct damage reduction is never hard to justify, especially while learning new rooms.
- Main limitation: It will not speed up fights by itself.
- Related guide: Twill Weave
Lace Glove
- Effect: Lace Glove raises Mina's Attack level by one.
- Best use: Melee-focused players who want faster kills without extra risk.
- Why it belongs in S tier: Clean damage is useful in bosses, normal rooms, and farming routes.
- Main limitation: It is less explosive than Uranium Bracelet.
- Related guide: Lace Glove
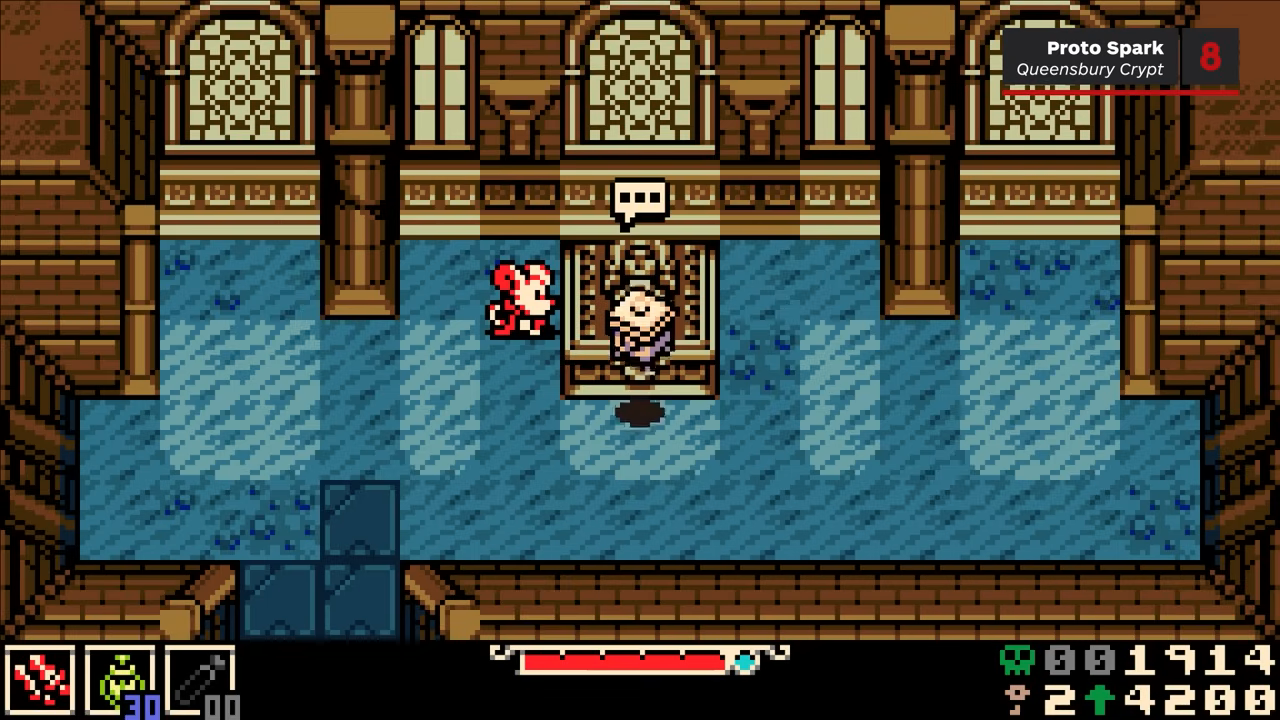
Proto Spark
- Effect: Proto Spark saves Mina from death once and resets after dying.
- Best use: Learning hard bosses and protecting long attempts.
- Why it belongs in S tier: A one-time death rescue changes how safely you can experiment.
- Main limitation: It does not refill every resource, so the revived attempt still needs careful play.
- Related guide: Proto Spark
Primed Vial Pouch
- Effect: Primed Vial Pouch adds two Plasma Vials and makes Vials restore some health even without Plasma.
- Best use: Long routes, first clears, and players who need extra recovery.
- Why it belongs in S tier: More healing capacity is easy to understand and hard to replace.
- Main limitation: It is defensive, so aggressive players may swap it after mastering a fight.
- Related guide: Primed Vial Pouch
Steady Soles
- Effect: Steady Soles lets Mina move normally on water, grass, stairs, and ice while resisting knockback.
- Best use: Hazard rooms, awkward terrain, and exploration.
- Why it belongs in S tier: Terrain and knockback often cause the mistake after the mistake; this prevents that spiral.
- Main limitation: It is less important in flat boss arenas.
- Related guide: Steady Soles
A Tier Trinkets
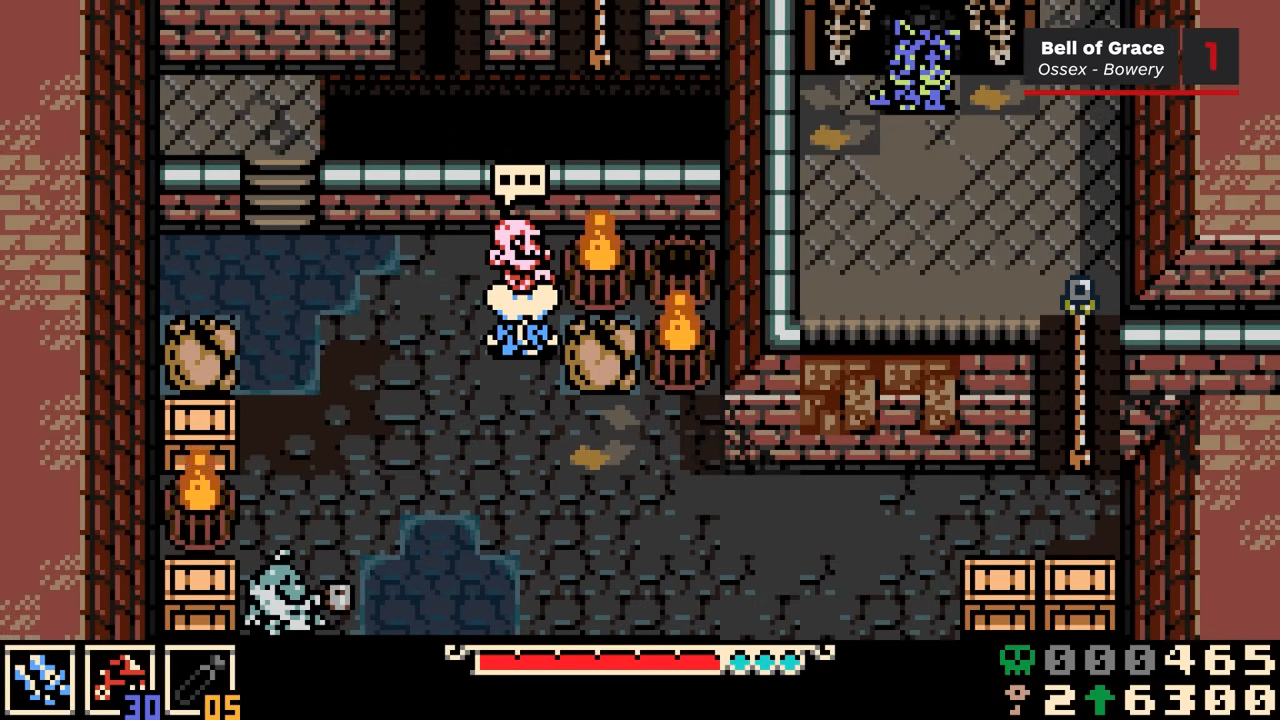
Bell of Grace
- Effect: Bell of Grace can preserve Spark on death and save half or all Bones after a sparkless demise.
- Best use: Early exploration, death-risk routes, and new players protecting Bones.
- Why it belongs in A tier: It does not win fights directly, but it reduces the cost of learning.
- Main limitation: It is less exciting once you are confident and wealthy.
- Related guide: Bell of Grace
Spark Catcher
- Effect: Spark Catcher gives an extra Spark Container, helps recover lost Sparks by hitting foes, and pulls loose Sparks toward Mina.
- Best use: Recovery routes and players who often fight back after death.
- Why it belongs in A tier: It improves both capacity and retrieval, which are useful in stressful rooms.
- Main limitation: It is less valuable if you rarely lose Sparks.
- Related guide: Spark Catcher
Chain Capacitor
- Effect: Chain Capacitor boosts damage as you attack enemies without missing; missing resets the combo.
- Best use: Bosses or large enemies with readable openings.
- Why it belongs in A tier: It rewards clean play with real damage gains.
- Main limitation: It falls apart in chaotic rooms where whiffs or target swaps are common.
- Related guide: Chain Capacitor
Keri the Wisp
- Effect: Keri the Wisp lets Mina press Jump in the air to float and extend a fall.
- Best use: Platforming, long drops, and movement correction.
- Why it belongs in A tier: Extra air control can save routes that would otherwise require perfect jumps.
- Main limitation: It is mostly utility and does not increase damage.
- Related guide: Keri the Wisp location guide
Tunneling Codex
- Effect: Tunneling Codex lets Mina hold Jump to burrow repeatedly without landing.
- Best use: Hollowing routes and movement chains.
- Why it belongs in A tier: It makes burrow movement smoother and opens cleaner traversal patterns.
- Main limitation: Its value depends on whether the room actually rewards repeated burrowing.
- Related guide: Tunneling Codex
Pit Preserver
- Effect: Pit Preserver bounces Mina up from pits or water and reduces pit damage.
- Best use: Pit-heavy regions and rooms where one fall causes repeated losses.
- Why it belongs in A tier: It directly solves a common exploration failure state.
- Main limitation: It is a swap candidate when pits and water are not present.
- Related guide: Pit Preserver
Vascular Syrup
- Effect: Vascular Syrup makes health decrease slowly on hit and prevents death until it runs out.
- Best use: Survival routes where a delayed recovery window matters.
- Why it belongs in A tier: It creates time to heal or reposition after a dangerous hit.
- Main limitation: It does not erase damage; it delays the consequence.
- Related guide: Vascular Syrup
Windfall Charm
- Effect: Windfall Charm makes Joule pickups restore Plasma, and foes hit by Sidearms can drop Joules.
- Best use: Sidearm sustain and resource-loop builds.
- Why it belongs in A tier: It connects offense, pickups, and recovery in a practical loop.
- Main limitation: It needs Sidearm play and pickup access to shine.
- Related guide: Windfall Charm
Evasion Powder
- Effect: Evasion Powder extends invulnerability after damage and briefly after exiting burrow.
- Best use: Learning rooms where one hit often leads to another.
- Why it belongs in A tier: It improves mistake recovery without asking for precise timing.
- Main limitation: It does not prevent the first hit.
- Related guide: Evasion Powder
Dodging Pendulum
- Effect: Dodging Pendulum lets Mina press Jump right before damage to dodge and become invulnerable.
- Best use: Players who like active defense and know enemy timing.
- Why it belongs in A tier: The payoff is strong when you can trigger it on purpose.
- Main limitation: It is less friendly than passive defense during blind play.
- Related guide: Dodging Pendulum
Willow the Wisp
- Effect: Willow the Wisp summons a wisp after damage that boosts attack damage and speed.
- Best use: Comeback pressure after unavoidable or accidental hits.
- Why it belongs in A tier: It turns damage taken into a short offensive window.
- Main limitation: A Trinket that activates after taking damage is still worse than not being hit.
- Related guide: Willow the Wisp
Smelling Salts
- Effect: Smelling Salts raises Sidearm level by one.
- Best use: Builds where Sidearms are part of the main damage plan.
- Why it belongs in A tier: A direct Sidearm stat increase is clean and reliable.
- Main limitation: It loses value if you mostly fight with melee.
- Related guide: Smelling Salts
Voltaic Guard
- Effect: Voltaic Guard blocks one lightning hit, breaks, and recharges after a short delay.
- Best use: Lightning-heavy enemies, traps, and boss patterns.
- Why it belongs in A tier: In the right route, one blocked lightning hit can save the attempt.
- Main limitation: Outside lightning threats, it is mostly a dead slot.
- Related guide: Voltaic Guard
Flame Guard
- Effect: Flame Guard blocks one fire or explosion hit, breaks, and recharges.
- Best use: Fire-heavy routes, explosive hazards, and forge-style encounters.
- Why it belongs in A tier: It is excellent specialist protection for a common damage type.
- Main limitation: It should be swapped out when fire and explosions are not the threat.
- Related guide: Flame Guard
B Tier Trinkets
Glutton's Jug
- Effect: Glutton's Jug fills after defeating 50 enemies while equipped.
- Best use: Buffo's quest chain, normal enemy clears, and farming loops.
- Why it belongs in B tier: It is useful when you already plan to defeat many enemies.
- Main limitation: It is not usually your strongest single-target boss option.
- Related guide: Glutton's Jug
Seismic Belt
- Effect: Seismic Belt lets Mina press Attack while burrowing to emit a damaging pulse.
- Best use: Burrow-forward combat routes and enemy groups.
- Why it belongs in B tier: It adds offense to a movement state you may already be using.
- Main limitation: It is weaker when enemies do not line up around your burrow path.
- Related guide: Seismic Belt
Shock Flint
- Effect: Shock Flint fires a shock ball when Mina attacks at full Plasma and health.
- Best use: Clean openers and ranged pressure before taking damage.
- Why it belongs in B tier: The payoff is good, but the condition is fragile.
- Main limitation: One hit can remove the setup that makes it special.
- Related guide: Shock Flint
Lightning Grip
- Effect: Lightning Grip calls a damaging bolt when attacking after healing and can trigger occasionally on hit.
- Best use: Builds that heal during combat and then re-engage quickly.
- Why it belongs in B tier: It gives healing a damage follow-up, which is useful in longer fights.
- Main limitation: The value depends on healing cadence and trigger timing.
- Related guide: Lightning Grip
Vial Salvo
- Effect: Vial Salvo launches missiles when using a Vial and grants bonus Plasma if foes are hit.
- Best use: Healing while enemies are nearby.
- Why it belongs in B tier: It makes a defensive action contribute to offense.
- Main limitation: If no target is in range, the payoff drops.
- Related guide: Vial Salvo
Bellows Bustle
- Effect: Bellows Bustle lets Mina press Jump while airborne to perform an air dash.
- Best use: Gap extension, dodge repositioning, and movement comfort.
- Why it belongs in B tier: Air dash control is useful, but not every route needs it.
- Main limitation: It competes with stronger movement Trinkets.
- Related guide: Bellows Bustle
Iron Lung
- Effect: Iron Lung increases maximum burrow time, even underwater.
- Best use: Underwater paths and long burrow checks.
- Why it belongs in B tier: It is strong whenever duration is the actual blocker.
- Main limitation: Outside burrow-duration rooms, it does very little.
- Related guide: Iron Lung
Bridge Weaver
- Effect: Bridge Weaver summons a web-weaving spider when Mina steps off a ledge, helping her cross gaps.
- Best use: Specific gap-crossing routes and exploration checks.
- Why it belongs in B tier: It can solve a traversal problem without being broadly mandatory.
- Main limitation: It is highly room-dependent.
- Related guide: Bridge Weaver
Spike Spurs
- Effect: Spike Spurs reduce spike damage and let Mina walk on spikes without knockback.
- Best use: Spike-heavy dungeons and hazard screens.
- Why it belongs in B tier: It turns spike rooms from scary to manageable.
- Main limitation: It is specialized and often swapped out after the route.
- Related guide: Spike Spurs
Valor Medallion
- Effect: Valor Medallion lets Mina move slightly while healing and prevents Plasma loss when struck.
- Best use: Healing in cramped rooms and boss attempts.
- Why it belongs in B tier: It is very comfortable, especially early.
- Main limitation: Plasma Funnel's faster drink speed is often the stronger default healing pick.
- Related guide: Valor Medallion
Helio the Wisp
- Effect: Helio the Wisp summons a friendly wisp after damage that restores health.
- Best use: Hit recovery and cautious survival builds.
- Why it belongs in B tier: Healing after damage can stabilize a bad exchange.
- Main limitation: It needs you to get hit first.
- Related guide: Helio the Wisp
Stolenoid
- Effect: Stolenoid pulls nearby pickups toward Mina.
- Best use: Bone farming, Joule pickup routes, and cleanup comfort.
- Why it belongs in B tier: It saves time and prevents pickups from being annoying to collect.
- Main limitation: It does not solve combat by itself.
- Related guide: Stolenoid
Deboning Wand
- Effect: Deboning Wand makes enemies reward far more Bones, but the Bones bounce around.
- Best use: Dedicated Bone farming.
- Why it belongs in B tier: It is one of the clearest economy tools when you need money.
- Main limitation: The bouncing Bones can make collection awkward without pickup support.
- Related guide: Deboning Wand
Watchful Eye
- Effect: Watchful Eye rewards extra Bones for defeating a foe without being harmed.
- Best use: Safe farming routes and practiced room clears.
- Why it belongs in B tier: It rewards clean play with useful economy.
- Main limitation: It is less helpful when you are still getting hit often.
- Related guide: Watchful Eye
Pneumatic Armlet
- Effect: Pneumatic Armlet supercharges throws, making thrown objects faster, farther, and more damaging.
- Best use: Rooms or bosses where throwables are part of your plan.
- Why it belongs in B tier: It gives object throws a real purpose.
- Main limitation: Not every encounter gives you good objects to throw.
- Related guide: Pneumatic Armlet
Reckless Beastium
- Effect: Reckless Beastium powers up the next few hits after healing, but makes Mina more vulnerable.
- Best use: Burst windows immediately after a planned heal.
- Why it belongs in B tier: The offensive payoff is real for confident players.
- Main limitation: The added vulnerability can undo the heal if you misread the window.
- Related guide: Reckless Beastium
Draining Beastium
- Effect: Draining Beastium makes Sidearms deal more damage but consume more Joules.
- Best use: Sidearm burst damage.
- Why it belongs in B tier: It raises output for builds already committed to Sidearms.
- Main limitation: It burns through Joules faster and needs sustain support.
- Related guide: Draining Beastium
Starving Beastium
- Effect: Starving Beastium makes Vials refill Joules on use but restore less health.
- Best use: Sidearm sustain plans that can tolerate weaker healing.
- Why it belongs in B tier: It can keep Sidearms moving in exchange for healing power.
- Main limitation: The reduced healing is dangerous during boss learning.
- Related guide: Starving Beastium
C Tier Trinkets
Bubble Ring
- Effect: Bubble Ring forms a protective shield after Mina strikes foes quickly enough.
- Best use: Multi-hit fights where you can build the shield before the next danger.
- Why it belongs in C tier: Absorbing one hit is useful, but setup timing matters.
- Main limitation: It is unreliable if enemies do not allow repeated hits.
- Related guide: Bubble Ring
Brisk Brew
- Effect: Brisk Brew makes Mina walk faster and grants a short speed burst after hitting a foe.
- Best use: Movement comfort and aggressive repositioning.
- Why it belongs in C tier: Speed feels good, but it is less important than route-opening mobility.
- Main limitation: Extra speed can also make precision harder.
- Related guide: Brisk Brew
Counter Vial
- Effect: Counter Vial launches a burst at the attacker if Mina is struck while readying a Vial.
- Best use: Players who often get interrupted while healing.
- Why it belongs in C tier: It punishes enemies for a common failure moment.
- Main limitation: It depends on being hit during a narrow healing setup.
- Related guide: Counter Vial
Desperation Bonnet
- Effect: Desperation Bonnet increases damage and lowers Sidearm cost when Mina is low on health.
- Best use: Low-health challenge play and risky clutch damage.
- Why it belongs in C tier: The upside is real, but only when Mina is already in danger.
- Main limitation: It encourages staying near failure.
- Related guide: Desperation Bonnet
Thermal Pack
- Effect: Thermal Pack boosts damage after death or after exiting Underlab, then fades and returns stronger.
- Best use: Recovery routing and players who like comeback mechanics.
- Why it belongs in C tier: It has interesting power spikes, but they are not always where you need them.
- Main limitation: It is less predictable than a permanent stat boost.
- Related guide: Thermal Pack
Tumbling Tutu
- Effect: Tumbling Tutu adds an airborne spin attack and lets Mina bounce off enemies.
- Best use: Rooms where bouncing and aerial attacks are safe.
- Why it belongs in C tier: It can be useful, but requires encounter-specific comfort.
- Main limitation: Aerial offense can become risky in cramped rooms.
- Related guide: Tumbling Tutu
Niter Belt
- Effect: Niter Belt creates a radial explosion when Mina emerges from burrow.
- Best use: Surfacing near enemy groups.
- Why it belongs in C tier: It rewards aggressive burrow positioning.
- Main limitation: You need to place Mina near danger to get value.
- Related guide: Niter Belt
Oozing Organ
- Effect: Oozing Organ leaves a damaging ooze trail while Mina is burrowing.
- Best use: Area denial and enemies that chase through your path.
- Why it belongs in C tier: It adds passive damage to movement.
- Main limitation: Mobile or ranged enemies may ignore the trail.
- Related guide: Oozing Organ
Repulsing Root
- Effect: Repulsing Root drops a shrieking Mourndrake when Mina is hit, pushing and damaging foes.
- Best use: Emergency spacing after taking damage.
- Why it belongs in C tier: It can stop enemies from piling on after a hit.
- Main limitation: You cannot benefit until after a mistake or forced hit.
- Related guide: Repulsing Root
Blinking Glass
- Effect: Blinking Glass sometimes avoids damage and gives Mina brief invulnerability.
- Best use: Casual safety when you are willing to accept randomness.
- Why it belongs in C tier: Damage avoidance can be great, but chance-based defense is hard to route around.
- Main limitation: It cannot be relied on for planned boss strategy.
- Related guide: Blinking Glass
Polyp Lamp
- Effect: Polyp Lamp glows faintly and reduces damage in dark places.
- Best use: Dark rooms and routes where visibility is part of the danger.
- Why it belongs in C tier: It answers one environment type well.
- Main limitation: In bright rooms, it loses most of its reason to be equipped.
- Related guide: Polyp Lamp
Bone Charm
- Effect: Bone Charm is a survival-first comfort Trinket with early-route value and tradeoffs.
- Best use: New players learning dangerous routes.
- Why it belongs in C tier: It can make the first hours less punishing.
- Main limitation: Stronger defensive tools usually replace it later.
- Related guide: Bone Charm
Spark Pin
- Effect: Spark Pin supports resource economy and Sidearm uptime.
- Best use: Sidearm-heavy builds that need more stable resources.
- Why it belongs in C tier: It can help the right build but is not a universal engine.
- Main limitation: It is weaker if Sidearms are not central to your plan.
- Related guide: Spark Pin
Warding Beastium
- Effect: Warding Beastium reduces damage taken but makes healing much less effective.
- Best use: Defensive experiments and routes where you can avoid relying on Vials.
- Why it belongs in C tier: Mitigation is attractive, but the healing penalty changes the whole run.
- Main limitation: It can make recovery harder than the damage reduction is worth.
- Related guide: Warding Beastium
Dead Leaf
- Effect: Dead Leaf turns Mina into a silent statue while she remains still and ends when she moves.
- Best use: Stealth survival, summon-based plans, and pattern learning.
- Why it belongs in C tier: It can be powerful in tested stationary setups but awkward in normal play.
- Main limitation: Many fights and rooms require constant repositioning.
- Related guide: Dead Leaf
D Tier Trinkets
Fly Bait
- Effect: Fly Bait attracts friendly flies after Mina defeats enemies.
- Best use: Enemy-heavy rooms where defeats come quickly.
- Why it belongs in D tier: It needs kills before it starts contributing.
- Main limitation: It does little at the beginning of a boss or sparse encounter.
- Related guide: Fly Bait
Dummy Cache
- Effect: Dummy Cache lets Mina press Heal to place a Joule-filled decoy that distracts enemies.
- Best use: Decoy experiments and crowd-control setups.
- Why it belongs in D tier: The effect is creative but competes with simpler survival tools.
- Main limitation: It asks for deliberate setup in moments where healing or dodging may be safer.
- Related guide: Dummy Cache
Moon Ring
- Effect: Moon Ring provides exploration comfort, trap forgiveness, and cleanup routing value.
- Best use: Specific trap routes and relaxed exploration.
- Why it belongs in D tier: It can help when its exact comfort effect matters.
- Main limitation: It rarely beats broader movement, defense, or healing Trinkets.
- Related guide: Moon Ring
Grave Token
- Effect: Grave Token is a risk-reward low-health option with extra attack and reduced defense.
- Best use: Challenge runs and players comfortable at low HP.
- Why it belongs in D tier: The damage upside is narrow and punishes mistakes hard.
- Main limitation: Most players get more reliable value from safer attack boosts.
- Related guide: Grave Token
Volatile Beastium
- Effect: Volatile Beastium makes foes sometimes drop a bomb on death.
- Best use: Room-clearing and enemy-heavy exploration.
- Why it belongs in D tier: It is fun when bombs chain into value, but boss value is inconsistent.
- Main limitation: Single-target fights often give it little to trigger from.
- Related guide: Volatile Beastium
Burning Beastium
- Effect: Burning Beastium creates damaging fireballs when Mina is hit, and you can jump or burrow to avoid them.
- Best use: Risky crowd-control experiments.
- Why it belongs in D tier: It can add damage, but only after Mina takes a hit.
- Main limitation: Fireballs can complicate positioning when you are already recovering.
- Related guide: Burning Beastium
Intravenous Vial
- Effect: Intravenous Vial automatically uses a Vial without drinking when enough Plasma is available.
- Best use: Players who forget to heal or prefer automatic recovery.
- Why it belongs in D tier: Automation can save you, but it also spends healing without your timing.
- Main limitation: Skilled players usually want to choose when the Vial is used.
- Related guide: Intravenous Vial
Top 10 Best Trinkets in Mina the Hollower
- Plasma Funnel - the safest all-purpose healing upgrade because faster Vials matter in bosses, hazards, and long routes.
- Twill Weave - the best simple defensive pick for first clears.
- Uranium Bracelet - the strongest damage option when you can manage its risk.
- Wallower's Gauntlets - the best exploration Trinket because it opens wall-burrow routes and cleanup checks.
- Proto Spark - one of the most forgiving boss-learning tools.
- Lace Glove - clean, reliable damage without a dangerous drawback.
- Spring Heels - excellent movement value across platforming and exploration.
- Primed Vial Pouch - more Vials and minimum healing make routes safer.
- Joule Syringe - the best Sidearm sustain engine if you are comfortable with its health-risk edge.
- Steady Soles - terrain and knockback control stay useful for a long time.
Best Trinkets to Get First
For the opening route, prioritize Trinkets that reduce punishment, make healing safer, and protect you from terrain mistakes. If you want a step-by-step pickup route, use the early-game Trinkets you should not miss guide after this ranking.
| Priority | Trinket | Why to get it first | Route note |
|---|---|---|---|
| 1 | Bell of Grace | Protects Bones and Spark recovery while you are still learning. | Follow Frayed's early Ossex quest chain. |
| 2 | Plasma Funnel | Makes healing much harder to interrupt. | Buy it from the early Trinket Bazaar route when you can afford it. |
| 3 | Steady Soles | Prevents terrain and knockback from ruining exploration. | Grab it once the High Street rooftop route is open. |
| 4 | Primed Vial Pouch | Adds two Vials and improves emergency healing. | Detour to the hidden basement south of Ossex. |
| 5 | Proto Spark | Gives one death rescue for hard attempts. | Complete the Duke route in Queensberry Crypt. |
| 6 | Twill Weave | Simple defense helps every blind route. | Equip as soon as slot space allows. |
| 7 | Lace Glove | Faster kills reduce enemy pressure. | Use when you are comfortable enough to trade safety for speed. |
| 8 | Spike Spurs | Makes spike-heavy rooms safer. | Pick up before pushing deep into spike routes. |
| 9 | Valor Medallion | Lets you move slightly while healing. | Strong early comfort if healing windows feel scary. |
Best Trinkets for Your Current Problem
| Problem | Equip first | Add if you have slots | Avoid if |
|---|---|---|---|
| I keep dying before learning a boss | Twill Weave | Proto Spark, Plasma Funnel | You are trying to speedrun damage with no safety margin. |
| I cannot heal safely | Plasma Funnel | Valor Medallion, Primed Vial Pouch | You prefer automatic healing over manual timing. |
| I need boss damage | Lace Glove | Uranium Bracelet, Chain Capacitor | You are still getting hit often. |
| I need exploration access | Wallower's Gauntlets | Spring Heels, Keri the Wisp | You are entering a pure boss fight. |
| I keep falling into pits or water | Pit Preserver | Steady Soles, Iron Lung | The room has no pit, water, or terrain problem. |
| I need Bones | Deboning Wand | Watchful Eye, Stolenoid | You are doing a strict boss attempt. |
| I want more Sidearm uptime | Joule Syringe | Windfall Charm, Smelling Salts | You are low on health and cannot manage the risk. |
Best Trinket Builds and Combinations
Slot availability changes throughout the game, so treat these as build templates rather than fixed final loadouts. If you do not have enough slots yet, equip the first two Trinkets in the row and add the rest later.
| Build | Core Trinkets | Optional add-ons | Best for | Slot caveat |
|---|---|---|---|---|
| Beginner Survival | Twill Weave + Plasma Funnel | Bell of Grace, Proto Spark | First clears, safer bosses, rough routes | Prioritize defense and healing before utility. |
| Boss Damage | Lace Glove + Uranium Bracelet | Chain Capacitor, Shock Flint | Shortening fights once patterns are known | Do not force Uranium Bracelet while learning blind. |
| Safe Healing | Plasma Funnel + Primed Vial Pouch | Valor Medallion, Vascular Syrup | Long attempts and healing-interrupt problems | If slots are tight, Plasma Funnel comes first. |
| Exploration Cleanup | Wallower's Gauntlets + Spring Heels | Keri the Wisp, Tunneling Codex | Secrets, revisit routes, map completion | Swap to combat Trinkets before major bosses. |
| Bone Farming | Deboning Wand + Watchful Eye | Stolenoid, Glutton's Jug | Buying shop items and farming safe enemies | Use only in rooms you can clear safely. |
| Sidearm Sustain | Joule Syringe + Windfall Charm | Smelling Salts, Starving Beastium | Sidearm-heavy combat and resource loops | Watch your health if Joule Syringe starts spending HP. |
Best Trinkets by Role
| Role | S/A picks | Practical note |
|---|---|---|
| Bosses | Plasma Funnel, Twill Weave, Lace Glove, Uranium Bracelet | Safety first while learning, Uranium Bracelet later. |
| Exploration | Wallower's Gauntlets, Spring Heels, Keri the Wisp, Tunneling Codex | Route access beats damage when you are cleaning up secrets. |
| Healing | Plasma Funnel, Primed Vial Pouch, Valor Medallion | Faster Vials are usually the best first healing upgrade. |
| Farming | Deboning Wand, Watchful Eye, Stolenoid | Pick safe rooms before optimizing the Trinkets. |
| Sidearms | Joule Syringe, Windfall Charm, Smelling Salts | Strongest when your weapon and route already support Sidearm use. |
Frequently Asked Questions
How many Trinkets are in Mina the Hollower?
This site currently documents 64 Trinkets in the Mina the Hollower Trinkets database, and this tier list ranks all 64 of them.
What are the best Trinkets to get first?
The best first Trinkets are Bell of Grace, Plasma Funnel, Steady Soles, Primed Vial Pouch, Proto Spark, Twill Weave, and Lace Glove. They help with death penalties, healing, terrain, and basic survival before you start optimizing damage.
What are the best Trinkets for bosses?
For learning bosses, use Plasma Funnel, Twill Weave, Primed Vial Pouch, and Proto Spark. For faster clears after you know the fight, add Lace Glove, Uranium Bracelet, or Chain Capacitor.
What are the best Trinkets for exploration?
The best exploration Trinkets are Wallower's Gauntlets, Spring Heels, Keri the Wisp, Tunneling Codex, Steady Soles, and Pit Preserver. Use them when route access, terrain, pits, or movement checks matter more than damage.
Is there one best Trinket for every build?
No. Mina the Hollower rewards swapping. Plasma Funnel is the safest general pick, Uranium Bracelet is a high-risk damage pick, Wallower's Gauntlets are exploration-focused, and Joule Syringe belongs in Sidearm builds.
How do I equip more Trinkets?
Mina can equip more Trinkets as her available Trinket slots increase. Trinket Bags are the slot-expansion items to watch for, but this site does not yet have a dedicated Trinket Bag route page, so avoid planning around max slots until you have confirmed your current in-game capacity.
Are D tier Trinkets bad?
Not always. D tier Trinkets usually have narrow triggers, unreliable payoff, or tradeoffs that make them hard to recommend as defaults. They can still be useful for experiments, challenge runs, or very specific rooms.
Should I copy the tier list exactly?
Use it as a starting point, not a law. If a boss keeps interrupting your heals, a healing Trinket is better than a damage Trinket. If you are cleaning up secrets, an exploration Trinket is better than a boss Trinket. Swap based on the current problem.